0

Bow Tutorial by Guest: Keep It Simple, Sweetie

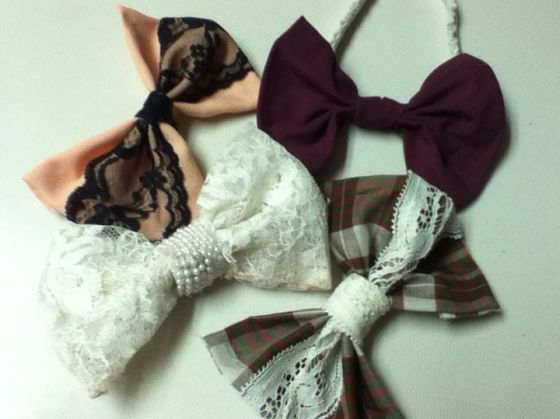
As many of you know I love to DIY and make creative things, so when I saw that my cute friends Katie and Savannha had started a Facebook page for their awesome DIY projects I knew that I had to invite them to do a guest post. 🙂 Here is how they make these adorable bows.

bows

Materials:
-Fabric
-Hot glue or Fabric blue
-Hair clip
-Lace (optional)

Start off by finding the perfect fabric for your bow! Once you have it you’re going to cut it into a square. The size of the square depends on your preference of how big you want your bow to be: the more fabric the bigger the bow! Once your fabric is cut you can choose to add lace by hot gluing it across the center of the square.

Place the side of the fabric you want to be the front down, leaving the side you don’t facing upwards. Take all of the edges of your square and fold them over about a ½ to 1 inch and glue them down. Let it set until the glue is completely dry.

Take your fabric and flip it over again so the side you want to show is facing upwards. Take two of the sides and push them together to make the middle of the fabric create a series of folds. Fiddle around with the folds until you are satisfied with it. Glue in between each fold so they stay in place.

Now you need to cut another piece of fabric (or any material that you think will look good, It’s your bow!) about an inch wide and three inches long to go around the entire middle of your bow. Once that’s all ready you need to glue it in place and let it dry. Last but not least you need to glue on some kind of hair clip to the back of the bow. Bobby pins can work but we don’t suggest them. Instead we suggest ones that have a clamp because they are more secure. You can even wear the bow on a collared shirt!

classy feminine bow tie

Once the glue is dry your bow is complete! We hope this helped you out! Remember, Keep It Simple, Sweetie.
-Savannha and Katie

Do me a favor and go like their Facebook page, it’s Keep It Simple, Sweetie at https://www.facebook.com/keepitsimple5759. They also have fandom shoes that you can custom order. 🙂
Fandom shoes

Head over to The Urban Pearl’s Facebook page for a giveaway where three lucky people will win one of these cute custom bows! https://www.facebook.com/TheUrbanPearl
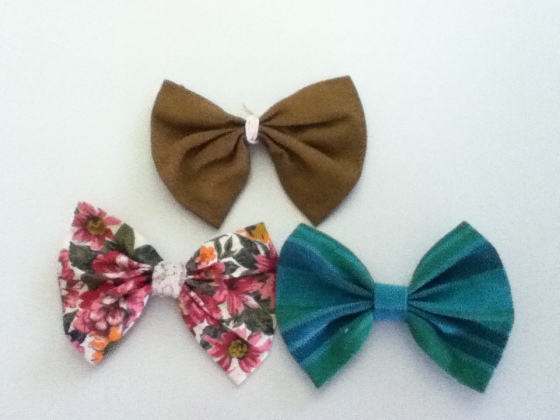
Giveaway Bows!

0

No Heat Curls

These no heat curls are perfect to do when you go to bed or if you have a while to get ready. They are super easy and you don’t have to fry your hair to get them. Cutting down on how much you use heat is a great step to making your hair healthy and growing it out. (:

No Heat Twisted Curls

1. After you get out of the shower, thoroughly dry your hair with a towel until it is just slightly damp. I always try to dry the back of my head as much as I can because it takes the longest to dry. Depending on how thick your hair is you will need to split it into two or three equal sections.

No Heat Curls

2. Twist the sections tightly away from your face. Keep them this way until they are completely dry.

IMG_6345

3. Hold them in place with a hair tie. My hair is layered so a few pieces usually fall out and I just re-twist them in. You will know when they are done because when you take out the hair tie they will stay curled together instead of trying to untwist.

IMG_6355

This whole summer I have managed to only use heat on my hair once because of these curls!:) If you are in a hurry you can do the same thing but blow dry it. If your hair is already dry you can twist your hair and use a straightener to make it stay like this pinner did:

straighterner curls

My hair is average thickness and if I towel dry it well this takes about an hour for very soft wavy curls, and two hours for the curls in this picture. Perfect hairstyle to do while sitting on Facebook and Twitter in the morning. 🙂

No Heat Curls

If you have any questions feel free to contact me, I’d love to hear from you! 🙂
Facebook: The Urban Pearl
Instagram: @theurbanpearl
Pinterest: The Urban Pearl
Twitter: @theurbanpearl

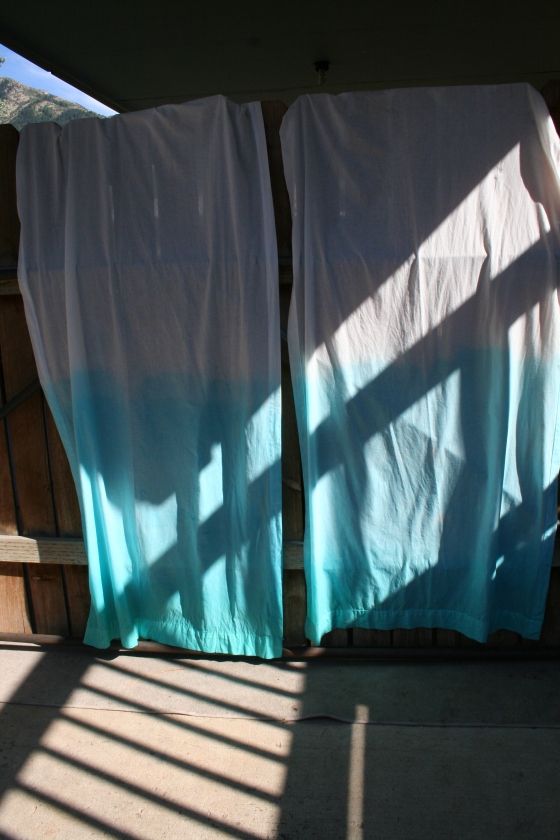
P.S. My ombre curtains made a perfect backdrop for a photo opp… https://theurbanpearl.wordpress.com/2013/07/29/diy-ombre-curtains/ ….go check out how to make them! 🙂

1

DIY Ombre Curtains

My lovely Aunt Christa wanted some ombre curtains for her cute little boy so I made some. 🙂

Dip Dyed Ombre Curtains

Rit Dye has a website with tutorials on how to do pretty much anything including ombre. This link is for dyeing a dress but it works just the same for curtains: http://www.ritdye.com/dyeing-techniques/ombr%C3%A9-dyeing Buy white curtains and you can get started. I followed the instructions for one pack of dye, then when I got to the very bottom I added another pack of color to make it even darker. It still wasn’t quite dark enough on the bottom so I think I might buy a darker blue and do the bottom again. This is what it looked like while I was doing it:

Dip Dye Ombre Curtains

What do you think? Would you like these ombre curtains for your home? Contact me if you would like me to make you some!:)
Facebook: The Urban Pearl
Instagram: @theurbanpearl
Pinterest: The Urban Pearl
Twitter: @theurbanpearl

0

Use Mod Podge to Add Flair to Your Home

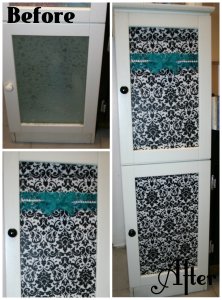
Do you have cabinets with those old outdated bubbles? Or do you want to spice up a bookcase or dresser? Mod Podge is here to save the day.

IMG_6320

You can buy Mod Podge at any Walmart or craft store. I bought the no name brand and it worked fine. Find fabric or paper that you would like to use and follow the instructions on the bottle. I hot glued on some cute ribbon and a bow to make it even cuter. Painting the knobs black was the finishing touch.


cabinets

This worked great and was such an easy update. I plan on doing many more Mod Podge projects in the future.

I post every Monday so make sure you don’t miss my next DIY! 🙂

Facebook: The Urban Pearl
Twitter: @theurbanpearl
Pinterest: The Urban Pearl
Instagram: @theurbanpearl

0

How to Revive Your Outdated Bathroom Cabinets

As I have been fixing up my home I came to the realization that I have been neglecting my bathroom. It is in need of  a major face lift! The first thing to go were these outdated 1980’s cabinets with their icky gold hardware.

Untitled

The first step is to take off the doors and the hardware. You will need to thoroughly sand them. I used an electric sander for the flat parts and a hand sander for the little cracks, but you can use a hand one on all of it. Wipe off all the dust with a towel, and then you are ready to paint!

The easiest way is with spray paint. I bought mine for around a dollar at Walmart. For the size of my cabinets I needed two cans of black and about half a can of silver.

For around $5 my bathroom looks brand new!

IMG_6330

Come back every Monday for new bathroom, home, and fashion DIY’s.

Have suggestions for my next DIY? Tell Me!
Facebook: The Urban Pearl
Twitter: @theurbanpearl
Pinterest: The Urban Pearl
Instagram: @theurbanpearl

0

Flag Shorts: 4th of July DIY

The 4th of July is in the top three list of my favorite holidays. I love fireworks, parades, fairs, and you can’t forget about that good ole’ USA pride. One way I’ll be showing my pride this year is by wearing these vintage style American flag shorts.

SHorts

Here’s what you’ll need to make them:
-Shorts/jeans you want to cut
-Scissors, tweezers, box cutter (if you want to distress them)
-Ruler
-Pencil/pen
-Matte fabric paint (I got mine from Michael’s)
-Foam paint brush
-Star stencil (or you can make your own with a box cutter)
-Studs (optional)

IMG_6239

The first step is to get your shorts the right length. When you’re cutting your jeans, remember that you can always cut off more, but you can’t put it back. I would suggest trying them on and using a pencil to draw where you want to cut. At this point you can distress the bottom edge of your shorts but I would wait until after painting to add any extra holes.

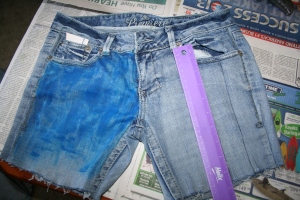
Once you have them how you like it’s time to paint the left side blue. I didn’t add a lot of paint because I wanted it to look faded and vintage. If you want it to be brighter add another coat.

While the blue is drying you can draw the stripes with a pen/pencil going vertically or horizontally like a real flag. My ruler was about an inch thick so I used it as a guide to draw the lines.

IMG_6258

Next, start painting in the red and white. I did all the red ones, then all the white ones so I wouldn’t have to wash out my brush every time. The same principle applies here: if you want vintage and faded, only put one coat. If you want bright and crisp add another.

IMG_6259

The last step is the stars. I didn’t happen to have a star stencil when I was doing this so I made my own. I traced a star onto a paper off of my computer, then put it over a Styrofoam plate. Using a box cutter I cut it out, then cut a square around it. This will work best if you have something like a card board box under it so it doesn’t destroy your table. This took me a few times to make a star that looked nice so I would suggest buying a stencil, or testing yours on a piece of paper before you use it on your shorts.

IMG_6237

To make your stars look clean you need to push the stencil firmly against the shorts so that no extra paint leaks where you don’t want it to. Take your paint brush and dab it down from above. Don’t make any sideways brush strokes because this will make the paint go out of the stencil. Also make sure that your brush does not have too much paint on it. Add as many stars as you like. If you want, now would be the time to add any holes, or extra distressed parts. Check out this video on how to do it: http://www.youtube.com/watch?v=pisFALYH_QE If your shorts still don’t look as faded as you want you can take sand paper and rough up any parts that need it.

SHorts

Don’t have enough time before the 4th of July to make these cute flag shorts? Buy some from me! I have this pair, a size 3/4, for $29.99, and sizes 6 and 7 for $34.99. Like The Urban Pearl’s Facebook page, share it with your friends, and follow @theurbanpearl on Twitter and the price is only $19.99! Hurry fast because Independence Day is right around the corner 🙂
Contact me to order any other size including children’s.
Facebook: The Urban Pearl
Twitter: @theurbanpearl
Instagram: @theurbanpearl
Pinterest: The Urban Pearl

2

DIY Ombre Denim Vest

I’ve seen these adorable ombre denim vests everywhere and wanted one for myself until I saw how expensive they are! Ranging from $30-$250, I knew I had to make one. I searched Pinterest, Instagram, Youtube and the internet to find out how to do it.

Here is the $89 vest from Lord&Taylor, and mine that I made for under $10 with household items.

Lord and taylor under 10

Supplies:
-Denim jacket
-Gallon of bleach
-Small plastic trash can or large bowl
-Box cutter, razor, tweezers, and scissors
-Glove
-Spray bottle (any empty cleaning one will work; optional)
-studs (optional)

First you need a jean jacket. My mom bought this Wrangler one from Walmart for $2.99. You can find them at your local goodwill for no more than $5.

Product Image

You can cut the sleeves off like I did, or you can keep it as a jacket. You will want it to look a little rougher so check out this Youtube video on how to distress denim: http://www.youtube.com/watch?v=pisFALYH_QE I also found that using a box cutter and slicing sideways is a good method. You can distress a few parts or the whole jacket. That’s the great part about doing DIY clothes is that you get to pick exactly how you want it to be! Once you have it how you like it, it’s time to ombre.

Note: Before you start this step please, PLEASE put on clothes you wouldn’t mind ruining and wear protective gloves! When I did this I made the mistake of wearing a cute shirt and it got a splash of bleach on it and I thought I could never wear it again. I turned it into a DIY of its own and splattered it more. This is what it looks like now:

IMG_6232

Take your bleach and pour it into a plastic trash can, or a large bowl somewhere outside that can get messy. It’s your decision whether you want to ombre the top like I did or the bottom like Lord & Taylor’s. Dip whichever side you chose into the bleach. The first time I tried this, it didn’t lighten when I had it in the bleach for 4 whole hours. I bought new bleach and it started to work within 5 minutes. Keep it in the bleach until it is almost the desired color then take it out and lay it down outside on the cement. The sun will speed up the process and bleach it more. It should naturally ombre in the bowl, but if it is a blunt line you can use a spray bottle and spray bleach between the two colors. I also sprayed just a little on the bottom for an acid wash effect. The collar didn’t get as white as I wanted so I sprayed more there as well.

While I was waiting for the vest to dry I had the idea to also bleach some shorts. I did the same exact process and they turned out just as cute!

IMG_6229

After your jacket has dried for about thirty minutes, wash it out as much as you can with your hose. You don’t want any leftover bleach on it because you are going to put it in the wash next. Wash and dry it and then you are ready to add any other accessories you want. I bought my iron-on studs at Michael’s; you can find them at any craft or fabric store. I put them in the pattern I wanted and followed the directions on the pack. I chose to put studs on one collar and pocket but this is another area that you can get creative with. The vest didn’t quite have the fit I was looking for so I used a pin to gather the back together. I made a bow and hot glued it over the pin and I was done!

IMG_6225

Did you like this tutorial? Like comment and share with your friends! Do you want your own unique Ombre Denim Vest without doing the work? Contact me and I will make you one for a price much lower than any store.

Facebook: The Urban Pearl
Pinterest: The Urban Pearl
Instagram: @theurbanpearl
Twitter: @theurbanpearl

0

Pinterest: Hit or Miss? Cookie Dough Bites

My boyfriend was begging me to bake something and this is the pin that he chose: Cookie Dough Bites

cookie dough bites

He liked it because we didn’t actually have to bake anything, and it involved chocolate chips. Neither of us are the cooking type so this pin was perfect. When I told him to start rolling them into balls this is what he did:

IMG_6211

After we actually started, these ended up taking less than ten minutes to make and were delicious! The only tip I would suggest is to melt the chocolate only 20 seconds at a time so it doesn’t burn.

cookie dough bites

This was definitely a Pinterest hit right in the bulls-eye.

bullseye

If you have any other recipes or pins that you want me to try leave a comment!

Twitter & Instagram: @theurbanpearl

Facebook &Pinterest: The Urban Pearl